
Article: Historic Floor Restoration That Preserves Character
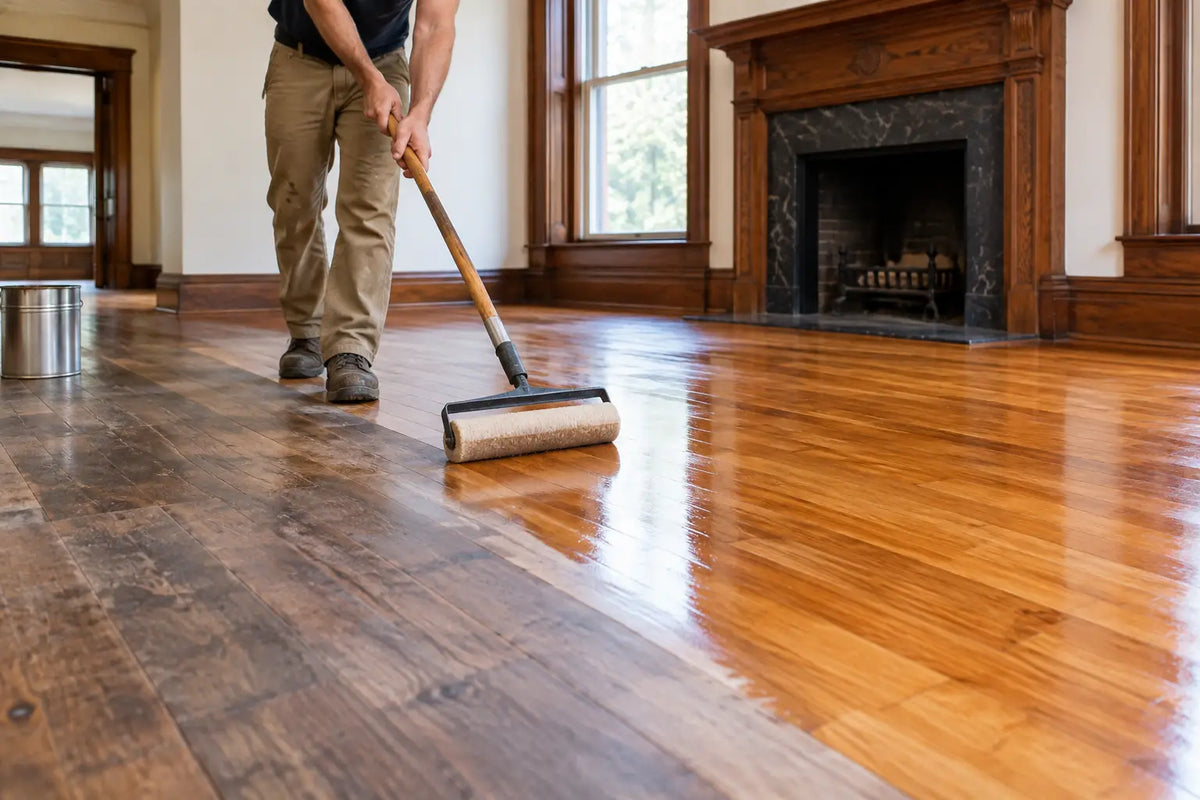
Historic Floor Restoration That Preserves Character
A century-old oak floor does not need to look brand new to feel renewed. The goal of historic floor restoration is to protect the material and craftsmanship that give an older home or commercial space its character, while making the floor safe, durable, and comfortable for daily use. Done well, restoration keeps the natural variation, patina, and proportions of an original floor without allowing wear, gaps, stains, or structural issues to take over the room.
For homeowners in older Kansas City-area properties, that distinction matters. A floor with visible history can be one of the strongest features in the house. The right approach respects that history while giving you a surface that can handle family life, pets, furniture, and changing seasons.
Historic Floor Restoration Starts With an Honest Assessment
Before anyone sands a board or selects a stain color, the floor needs a careful inspection. Older hardwood floors can hide problems beneath rugs, old finishes, and previous repairs. Some conditions are cosmetic. Others affect whether the floor can be restored safely and successfully.
A professional assessment looks at the thickness of the remaining wear layer, the condition of the tongue-and-groove joints, loose boards, water damage, insect damage, movement, and subfloor stability. It also identifies the wood species and the likely age of the floor. Oak is common in many historic homes, but maple, pine, fir, hickory, and mixed-width boards each respond differently to sanding, staining, and repairs.
The key question is not simply, “Can this floor be refinished?” It is, “What level of work will preserve this floor best?” A solid hardwood floor may have enough material for another careful sanding. A thin floor, severely cupped boards, or a floor with extensive prior sanding may need a lighter restoration plan, targeted board replacement, or repairs without aggressive sanding.
That is why a quick quote based only on square footage can be misleading. Historic work requires decisions that match the actual condition of the floor, not a one-size-fits-all process.
What Makes Older Wood Floors Different
Historic floors were installed under very different conditions than modern flooring. The boards may be narrower, wider, face-nailed, milled differently, or installed over a subfloor that has shifted over decades. They may also carry marks from old heating systems, previous room layouts, removed walls, or generations of use.
Those details are not automatically flaws. Small nail holes, color variation, and gentle wear often contribute to the floor’s appeal. Trying to erase every sign of age can leave an old floor looking flat or overly uniform. On the other hand, splintering, deep pet stains, black water marks, uneven repairs, and failing boards should not be treated as character. A good restoration separates the features worth preserving from the damage that needs attention.
Moisture is another major consideration. Wood expands and contracts with humidity, and older homes can have ventilation or foundation conditions that make movement more noticeable. If a floor is cupped, buckled, or showing wide seasonal gaps, the cause should be addressed before cosmetic work begins. Refinishing a moisture-damaged floor without correcting the underlying issue may produce a short-lived result.
Repair Before Refinishing
The best historic floor restoration projects typically spend more time on preparation than homeowners expect. Repairs create the foundation for a finish that looks intentional and performs well.
Loose boards may need to be secured, damaged planks may need to be replaced, and gaps may need to be evaluated individually. Not every gap should be filled. In a floor that naturally expands and contracts, rigid filler can crack or push out over time. Narrow, stable gaps may be repairable, while larger seasonal gaps may be better left as part of the floor’s natural movement.
When boards must be replaced, matching is more than choosing a similar color. Grain pattern, board width, cut, thickness, and species all influence how the repair blends in. New wood will often look lighter at first, especially next to boards that have darkened over decades. A skilled flooring professional can blend the area through careful material selection, stain testing when appropriate, and finish application, but a perfect invisible match is not always realistic. That trade-off is part of preserving an authentic floor rather than replacing it wholesale.
Repairs also offer a chance to solve practical issues. Squeaks can sometimes be reduced by securing the subfloor or adjusting fasteners. Uneven transitions between rooms can be improved. Old floor vents, thresholds, or patches from removed radiators may be repaired in ways that keep the room functional without hiding its history.
Choosing the Right Sanding Approach
Sanding is where historic floors can gain a new life or lose too much of their original material. The right method depends on board thickness, existing finish, flatness, repairs, and the homeowner’s goals.
A full sand-and-refinish may be appropriate for a solid floor with enough remaining material and widespread surface wear. This process removes old finish, levels minor imperfections, prepares repaired areas, and creates a clean surface for a new protective coating. It can dramatically improve deep scratches, worn traffic paths, and uneven coloration.
However, full sanding is not always the best answer. Floors with a thin wear layer, delicate edges, deep bevels, or historic details may benefit from a less aggressive screen-and-recoat process. This refreshes a worn finish without removing as much wood. It will not erase deep stains or level significant damage, but it can extend the floor’s life and preserve more original material.
The finish choice also affects the final look. A clear finish keeps the wood closer to its natural tone, while stain can help balance patches or shift the color toward a warmer or darker look. Dark stains can make a room feel dramatic, but they also tend to show dust, scratches, and pet hair more readily. Natural and medium tones often make historic grain easier to appreciate and are more forgiving in busy households.
For most homes, a durable modern protective finish provides practical benefits without sacrificing the look of traditional wood. The right sheen matters, too. Matte and satin finishes soften the appearance of everyday wear, while glossier finishes reflect more light but show scratches and imperfections more easily.
Protecting Architectural Character During the Work
Restoring an old floor is not only about the boards underfoot. It also means working carefully around baseboards, trim, built-ins, fireplaces, stairs, and doorways that may be original to the property.
A thoughtful project plan protects adjacent surfaces, manages dust, and identifies areas that need special handling before work begins. In an occupied home, homeowners should also plan for furniture removal, access restrictions, pets, ventilation, and curing time. A floor can look dry before its finish has fully cured, so following care instructions after the project is just as important as choosing the finish.
If a building may contain older coatings, paints, or adhesives, appropriate testing and safe work practices should be part of the conversation. Older properties can come with surprises, and clear communication before work starts helps prevent costly changes later.
Commercial and public-facing spaces may require additional planning around business hours, foot traffic, tenant access, and phased work. A carefully scheduled restoration can reduce disruption while still giving the floor the preparation and cure time it needs.
When Restoration Is Not the Best Option
Preservation is valuable, but it should not override safety or long-term performance. Floors with severe rot, widespread structural failure, extensive insect damage, or repeated moisture intrusion may require partial or full replacement. In some cases, keeping a section of original flooring as a feature while replacing damaged areas is the most practical solution.
There are also situations where a homeowner wants the appearance of hardwood but needs greater moisture resistance or a lower-maintenance surface in part of the home. Luxury vinyl or laminate can be a sensible complement in basements, laundry rooms, or high-moisture areas, while original hardwood remains the focal point in living spaces and bedrooms. Choosing materials by room is often more affordable and durable than forcing one flooring type everywhere.
The right recommendation should be based on the floor’s condition, how the space is used, and your budget. Restoration is an investment in the life of the existing floor, not a promise that every old board can be made perfect.
Care That Helps Restored Floors Last
Once the work is complete, simple habits make a meaningful difference. Use felt pads under furniture, place breathable mats at exterior doors, clean up spills promptly, and avoid wet mops or harsh cleaners. Sweep or vacuum with a hardwood-safe attachment regularly, since grit can act like sandpaper under shoes and furniture.
Humidity control matters in Greater Kansas City, where seasonal changes can be significant. Maintaining reasonably consistent indoor humidity helps limit extreme expansion, contraction, and gaps. When the finish begins to look dull in high-traffic areas, scheduling a recoat before bare wood is exposed can prevent the need for more intensive sanding.
Historic floors have already lasted through decades of daily life. With careful repair, appropriate finishing, and a plan built around the home rather than a generic process, they can remain one of the most valuable and welcoming parts of the space. If you are considering restoration, a detailed on-site evaluation is the best first step toward protecting what makes your floor worth saving.


Leave a comment
This site is protected by hCaptcha and the hCaptcha Privacy Policy and Terms of Service apply.